Net Banking

  • NetBanking
  • Mobile Banking

netbanking 16/03/2022 Leave a Comment

How to Register Airtel Payments Bank? Airtel Money How to use it

How to Register Airtel Payments Bank? Airtel Money How to use it? Airtel Payments Bank Mobile Application Download, Airtel Money wallet operate without internet.

Airtel money is an initiative by the telecom company Airtel to make payments more easy and comfortable to the users. It is one of the public sector units also can be marked as the first company to get license as payments bank from the Reserve Bank of India. It can be clearly stated as a subsidiary of the Airtel company which provides telecom services to its customers.

The main objective of starting this Airtel Money is to make sure all the individuals get easy access to banking transactions even if they do not have access to physical access to banks, in India there are many villages that still live in dark and without any basic knowledge of banking and financial services that can be availed by them to maintain and improve their basic standards of living. Airtel money is now hoping to reach out to all such people to improve their banking services.

Register Airtel Payments Bank

Operate without internet

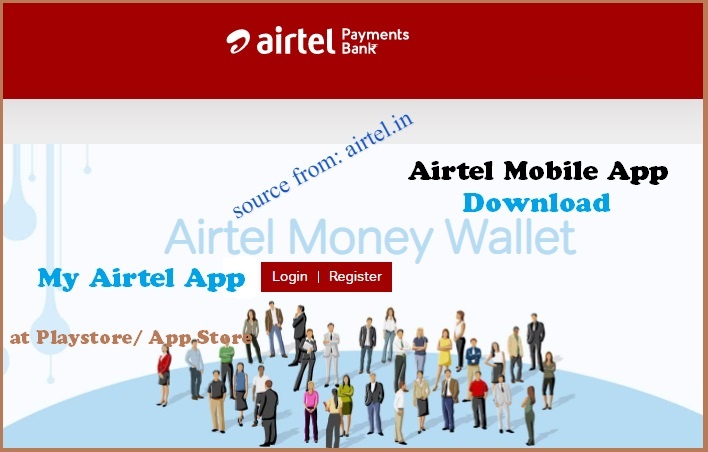
One can avail the Airtel money using the ‘my airtel app‘ or using the USSD technology. One can also use the same services without internet by dialing *400#

You can hear the main menu, a list of services available with them when you dial the number. One has to ensure that their mobile supports USSD technology. But it is recommended to have proper internet connection and transact through my airtel app for more services and faster access.

One more interesting point that one can find using airtel money is that you do not need a specific bank account to transact using this service. All the online money transacting apps that are now available in market would definitely require you to have a bank account and a minimum balance in that account in order to avail the services. So airtel money has made an major impact providing without bank account services. You can directly open a airtel money bank account within the airtel money website with easy steps and procedures.

All you need is a mobile number that has to be linked to your airtel money, all you have to transact is the mobile number of the person you want to make payment to and the mobile number should have been linked to airtel money.

Registration for Airtel Payments Bank

  • In the first step you will be required to visit the page airtel.in and click register option.
  • Then enter your mobile number that you want to link with your airtel money, in the next box you will see a list of proof documents that you can select from. List of proofs include the aadhar card, driving license etc.
  • Click next and in the next page you will have to create a pin for your account’s security purposes.
  • You will receive an OTP to your registered mobile number. Enter the OTP in the box provided and verify it.
  • Once your verification is successfully done you will be registered for airtel money app.
  • You can then download the app and use the app for your transactions.

Steps to get started with Airtel payments bank

  • First step is to download the my airtel app in to your android/ ios phone.
  • You will need to sign up using your mobile number and password.
  • Click on payments bank option and then click on Airtel Payments Bank UPI
  • You will now receive an OTP, enter the OTP and get its verification done.
  • Now you will be asked to link your bank account, you can link your existing bank account or payments bank account whichever you want to add.

Hope the article is useful and information and has helped you get your airtel money done. Keep visit our page at net-banking.co.in for more updates..,

Filed Under: Airtel Payments Bank Tagged With: Airtel Payments Bank

netbanking 15/03/2022 Leave a Comment

Postal Savings Schemes Sukanya Samriddi, PPF, TD, 5 Years RD, Kisan Vikas Patra

Postal Savings Schemes Sukanya Samriddi, PPF, TD, 5 Years RD, Kisan Vikas Patra Accounts, NSC (National Savings Certificate, Post Office Monthly Income, etc., Services & Benefits. About post office scheme.

Savings are always an important part of anybody’s financial planning. No matter how much a person earns, if he does not have a proper financial planning and separate set of amount for savings, the person will not have enough money in time of need. It is to be noted that a small amounts of savings from childhood will lead to bigger amount of money in your hand in later days.

Postal Savings Schemes Benefits
Post Office Savings Schemes

Always make a habit of saving some amount of your salary or revenue in order to face the future unforeseen issues or situations. In India one of the best options to invest is into post office. The Indian post offices not only provide postal and courier services but also provide various platforms for the customers to invest their money and to make proper financial decisions.

Postal Savings Schemes Benefits and Services

At present there are 9 postal savings schemes with various benefits and services.

  • The first one we discuss here is the Public Provident Fund (PPF) is one of the schemes which is beneficial at a longer period and as per this scheme the lock down period for the amount paid would be 15 years, however one can make a partial withdrawal of after saving in this scheme for 5 years.
  • Next one would be National Savings Certificate (NSC) wherein the scheme is very beneficial for those who wants to make investments but who has minimal amounts of income and revenue. An amount of 100 rupees can be made as an initial investment for this scheme.
  • Post Office Monthly Income Scheme is one of the schemes for those who wants to have a standard and regular income. One can invest a huge amount in this scheme and can get periodical returns.
  • Sukanya Samriddhi Account is a scheme initiated by the postal services to help the parents of girl child reduce the burden of child’s higher education and child’s marriage. Under this scheme parents or guardians of the girl child can open the account and save the amount periodically so that the huge amount will be given to the girl child once the girl reaches the age of 21. The parents should make sure that they should start this scheme before the child reaches 11 years of age. Any girl who us below the age of 10 years will be eligible to this scheme.
  • There are many other savings scheme under the postal services which includes the Senior Citizen Savings Scheme which will help the senior citizens who are willing to deposit their retirement amount and wants a regular return on their retirement amount.

Likewise there are many schemes which will help people to make investments and enjoy the income from the interest.

The interest rates are different for different schemes and one has to make a proper analysis before investing into any scheme.

Other schemes include Kisan Vikas Patra, Post Office Time Deposit Account, 5-Year Post Office Recurring Deposit Account, Post Office Savings Account and many more are as under.

  • The Kisan Vikas patra scheme helps you to earn double amount of your investment if you wait for 10 years.
  • The Post Office Time Deposit Account is a scheme that gives you return same like your fixed deposits in other banks. You can choose tenure as per your requirement like 1, 2, 3 and 5 years. Minor children after the age of 10 can open their savings under this scheme under their guardian.
  • 5-Year Post Office Recurring Deposit Account is such a scheme that allows you to make huge amount with smaller monthly contributions.
  • Post Office Savings Account is an account that will operate like a savings account in your norm banks. You can also make transfers from your post office savings account.

Open Indian Postal Payment Bank Online

Keep visiting the page for more updates and hope the information provided is useful for you and help you make wise decisions in financial investments.

Filed Under: IPPB, Post Office

netbanking 30/03/2021 1 Comment

Bandhan Bank Neo Savings Account open online in few minutes

Bandhan Bank neo savings account open online in few minutes. How to open Bandhan Bank Account in online at bandhanbank.com..,

Bandhan bank is a public sector bank established in the year 2015 in India and is one of the leading banks of the country. Opening an account in bandham bank is easy and can be done within few seconds using online services provided by the bank. If you are about to open bandhan bank account and are in search of correct and easy way to do so then you are at the right place. In this article let’s have a clear understanding of all the steps that are required to open a bandhan bank online account.

How to open Bandhan Bank Neo Savings Account – Apply Now

  • In the first step you will be required to visit the official website of the bandhan bank.
  • In the home page of the bandhan bank you will see an option stating ‘account’, click on accounts option then a new page appears asking you to select for savings or current account.
  • Click on ‘savings account’ option then slide down to see an option names neo+savings to continue opening your account online (or) you can also apply directly by clicking on this link www.bandhanbank.com/apply

Bandhan Bank neo saving account open online

Bandhan Bank neo saving account open online in few minutes.

  • Then a new window appears on the screen with various important points for you to note down before proceeding with the next step. Click on the option that states ‘i want to open neo+digital savings account‘.
  • Then click on ‘open savings account now’. In the next window enter your phone number then you will receive an OTP, enter the OTP that you have received and then click submit and a pop up asking you to allow Google to locate your location. Then you will be required to enter your email id.
  • In the next step you will be required to enter your pan card details and also your aadhar card details for KYC. You will receive an OTP to your mobile number linked to the aadhar card number provided then enter the OTP in the space provided.
  • Then tick the terms and conditions option and then click on the option ‘proceed to personal details’ which you will find at the bottom of the page.
  • Then in the next page you will see all your details as per your aadhar card, cross check the details and enter your other details like your father’s name, mother’s name, spouse name and other related information.
  • Click on proceed to income details. In the next page you will be required to provide your income details like your annual income, occupational and other boxes to be filled.
  • Then you will be asked to provide your nominee details, and then you are at end of the process. You will be shown all the details you have provided till now once you click on reviews details.
  • Then you can add fund to your new bandhan bank account from your debit card or using net banking then you can able to view your account number and other related documents if you wish to view the account details.

Keep visiting the page for more updates and information about the bandhan bank.

Filed Under: Bandhan Bank, Bandhan Bank Neo Savings Account Registration, NetBanking Tagged With: Bandhan Bank NEO Savings, Bandhan Bank Online Account Registration, Bandhan Bank Savings Account

netbanking 14/03/2021 Leave a Comment

IRCTC Advance Train Ticket Booking throug online at irctc.co.in IRCTC Login Procedure

How to Book Train Tickets on online at irctc.co.in? How to Login IRCTC for Train Ticket Booking? How to Book IRCTC Advance Train Ticket through online at IRCTC website

Booking train tickets online is as easy as drinking a coffee these days, all you need is a mobile phone, good internet connection. Despite the olden days where people used to stand in lines hours together just to fill a reservation form and never sure that we got the reservation or not. Sometimes after all the wait the reservation used to get closed and all the strain would go without any result. Over the years with the development of technology and mobile phones things have become easy and no one goes to railway station these days to book reservation of railway tickets. Here in this article let’s have a brief summary on how one can book train tickets in online at IRCTC website without any difficulty and trouble.

IRCTC Advance Train Ticket Booking through online
Get Advance Train Ticket through IRCTC website

IRCTC Advance Train Ticket Booking through Online

  • All you need to do in the first step is to go to the official website of IRCTC which is irctc.co.in
  • Then you will asked to login to your IRCTC Account, login using your user name and password or else you can create in that page if you do not have one.
  • A page appears with option ‘book now’. Click on book now option.
  • A new page open wherein you will be required to provide your TO and FROM destinations and then select dates.
  • Then you will be displayed with a list of trains running on the specific day you have selected and in the specified route you have selected.
  • Then you can look for availability of the seats from the various trains provided on the screen.
  • If you see availability then click on passenger details option which you can see in the page.
    Enter the passenger details like the name of the passenger, age, sex and you can also add preferred berth.
  • In the next page you will be continued with payment option, you can pay using your credit card, debit card, UPI ,Paytm, phone pe and various other digital payment modes.
  • Once your payment is successfully done you will receive a message and also a mail to your specified email ID confirming on your payment and also the details of your train as well as the berths allocated to you.
  • And that it you are all set to start packing for your journey. You can also download IRCTC application from play store and follow the same steps and book a train ticket online without being feeling stressed and within few minutes.

Hope the article is useful and informative and keep following the page for more updates and information.

Filed Under: Book Train Ticket, IRCTC Login Tagged With: Book Train Ticket, IRCTC Login, Train Ticket Advance Booking

netbanking 02/03/2021 Leave a Comment

How to Solve ‘Failed to Establish Connection to the Server’ Kindly Restart the Emsigner in Firefox, Chrome, Opera Browser

How to Solve ‘Failed to Establish Connection to the Server’? Failed To Establish Connection to the Server, Kindly Restart the Emsigner in Mozilla Firefox, Chrome, Opera. Solution for Register or Digital Signature Certificate for Filling GST at https://127.0.0.1:1585

Most of us must have seen failed to establish connection to the server error while we are filing the tax returns. It is very important to file our tax returns within the time period specified by the government. We will plan everything to file returns within time period but however we get some technical issues while processing the tax returns. One of such technical issues faced by most of us is ‘failed to establish connection to the server‘. In this article lets discuss how we can overcome this technical error and proceed with filing the tax returns.

Failed to Establish Connection to the Server Kindly Restart the Emsigner
Failed to Establish Connection to the Server

Steps to solve ‘Failed to establish connection to the server’

  • In the first step all you need to uninstall the existing Emsigner and install a new Emsigner.
  • Here is how you can uninstall and install new Emsigner, go to the user name which you can find at the top right corner.
  • In the dropdown you can find an option named update DSC. Click on update DSC.
  • A new page opens up, in the end of new page you can find ‘click here for steps to install document signer. Click on that link.
  • You can see steps in the page opened, get back to before page and then click on option to download windows.
  • Then a file gets downloaded, save the downloaded file to your computer.
  • Click on the file that is downloaded, click on next and then click next, then you can see the file running and then once done click finish button.
  • Then go my computers and right click on the downloaded file and select as administrator option.
  • Open Firefox in your computer, go to options – security- exceptions- add https://120.0.0.1:1585 – click allow.
  • Go to start option in your computer and type CMD, a new popup opens, type as below mentioned in that popup.
  • Nets’ interface portproxy add v4tov4 listenport=1645 listenaddress=127.0. 0.1 connectport=1585 connectaddress=127.0. 0.1
  • Then open a new tab in firefox and type https://127.0.0.1:1585
  • Click on advanced in the next page, click proceed and then click reload and here you go you are all set to proceed to your file the tax returns.

Keep following our page for more details and information on ‘Failed to Establish Connection to the Server’ Kindly Restart the Emsigner. Hope the article is helped you to overcome the technical issues while filing the tax returns. For more details visit the official website at gst.gov.in/

Filed Under: Digital Signature Certificate, Failed to Establish Tagged With: Digital Signature Certificate, DSC, Failed to Establish

Next Page »

Net-Banking.co.in © 2018-22 | This is not the Official website and we are not responsible for any mistakes in the content published in this blog / website | Privacy Policy | Disclaimer | TC | Contact Us